Save as tutorial
This is a tutorial to show you exactly how to use the SAVE and SAVE AS commands. You use the commands the same in all applications. For this example we will use the word pad program. So get a coffee and relax lets play.
Save as command
Give the page a second to load, I used all pictures for the tutorial to make it easier.
This is how the save as command works. We will use the wordPad program for an example on how to use the save as command.
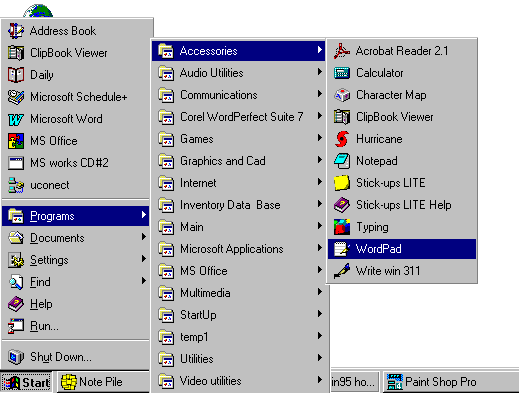
Click start then programs then accessories then click wordPad.
The wordPad program should come up. Example of wordPad:
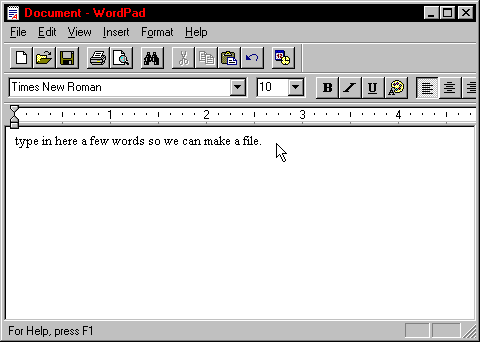
Type in a few words on the blank page.
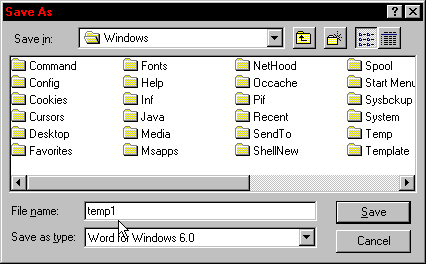
Click file and then save as a save as dialog box will come up. Near the bottom center of the box you will type in the name for the document in the file name area. We will name the file temp1 as the example below shows. Before you press the save button take a look at the dialog box, at the top of the box is a save in: area this is the folder that the file you just made is located. You can hit the drop down menu and change the folder you save your document in. For now we will use the default windows folder. That is how to save a new document.
Next I will explain how the save works. when you have a document open and you would like to save the work that you have done, all you have to do is hit file save. (there is also a save button on the tool bar for ease of doing this task) That way the changes to the document you have open will be saved. You should make it a habit to save your work every ten minutes or so just in case the power goes out. If you don't and the power goes out everything you typed will be lost. Microsoft word and other advanced word processor programs have an option to auto save open documents on a times basis, this way you don't have to worry about saving manually. That is all for the save as tutorial. Check out my other tutorial they are just as easy to follow.